Some might say that embroidering a baseball cap isn’t a challenge…. well, Houston, we have “oh shit”
Back Story:
Fathers day was coming…. I don’t have loads of money so I like to make things for those I love. Sadly, my father and father-in-law don’t seem to be as fond of beautiful aprons as the mothers and friends in my life. So I had a wonderful idea that I would make hats.
The Problem:
My Singer XL 420 does not have a hat hoop.
The Solution:
The Hat hoop from http://hathoop.com
The Hat Hoop is an after market hoop adapter that fits into your machine’s hoop and allows you to attach a baseball cap. I plan on trying other hats, but I want to get one baseball cap to work before I go exploring my options.
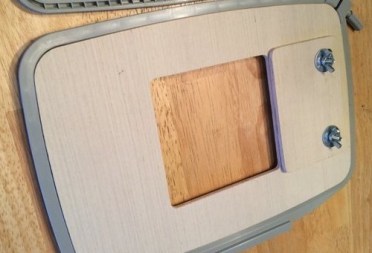
The hoop adapter that I needed was the Singer Quintet Large Hoop.
Oh Shit #1:
Be careful which hat you decide you are going to embroider. I chose a beautiful hat off of amazon with a nice rigid front which I thought would be easy to embroider on….
If this had been a hat hoop with a contour then it would have been the ideal hat. This thing had structure. Sadly the hoop wants you to flatten out the front of the hat and stick it down to the stabilizer.
What I bought and had to return:

Premium Original Flexfit Cotton Twill Fitted Hat
What I bought that worked:
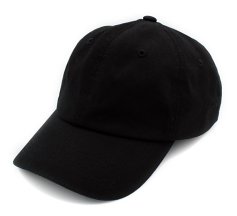
Cotton Classic Plain Baseball Cap
Notice this hat is floppy and soft. It fit into the hoop with only a little cursing. I used some pins (I know that is bad karma) to hold the edges flat against the sticky stabilizer.
Oh Shit #2:
Picking my design…
There are rules of thumb that should be followed when picking your design. You should never expand or shrink an image more than 10% – 15%. This is because of a whole slew of issues. If you are really curious what those issues are here is a very informative article as to how to best adjust your sizes:
The Pros & Cons of Resizing Designs By Barbara Geer
I have been going by a different rule of thumb that was passed to me from an embroidery class I took last year where the teacher said this, ” You should be fine expanding your image no more than 150% and shrinking it no more than 50%. This won’t hold true in all cases but should cover most designs.”
Well, I just ran into one of those designs that wasn’t covered under “most”.
My father in law loves Native American designs. He chose this design which I had already purchased for my personal library.
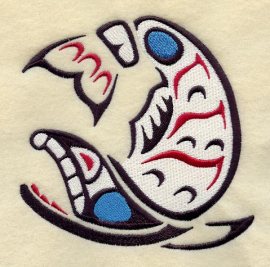
Creation Salmon Quilt Block – Lg
Size: 5.76″(w) x 5.98″(h)
(146.3 x 151.9mm)
Stitches: 29532
The hat hoop requires an image under 4″ x 4″
For my needs I resized the image with my Singer futura software and made the image 3.7″ x 3.85″ or 65% of the original design. Well within my previous rule of thumb.
I hooped my hat, I traced my design to ensure it would fit within the Hat Hoop space allowed and I was all good!
Things went down hill from there.
I had deleted the first layer because I just wanted to see the black of the hat instead of choosing a color to contrast against the red I had chosen for the outline.
The second layer (a pretty gold) went down easily.
The third layer (the outline which was being done in red) looked okay until it started to trace the previous layer….
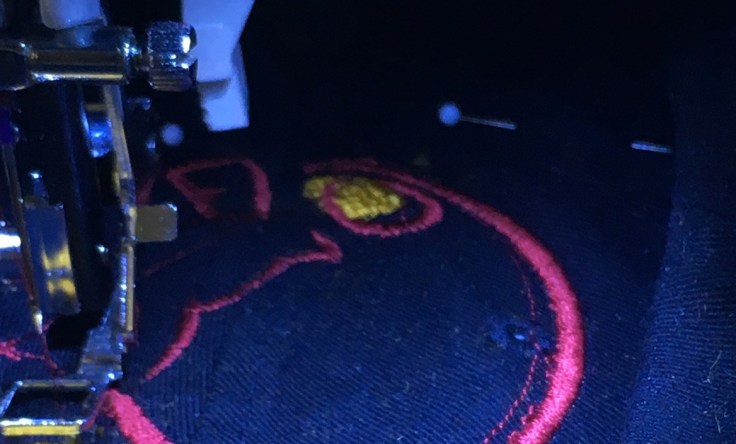
Cue the cursing…
As you can see the first and second layers are out of phase. Basically when I had resized the image the software wasn’t able to keep the layers lined up and the first layer was about two millimeters up and left of the second layer. I tore out the stitches multiple times trying to get things to line up.
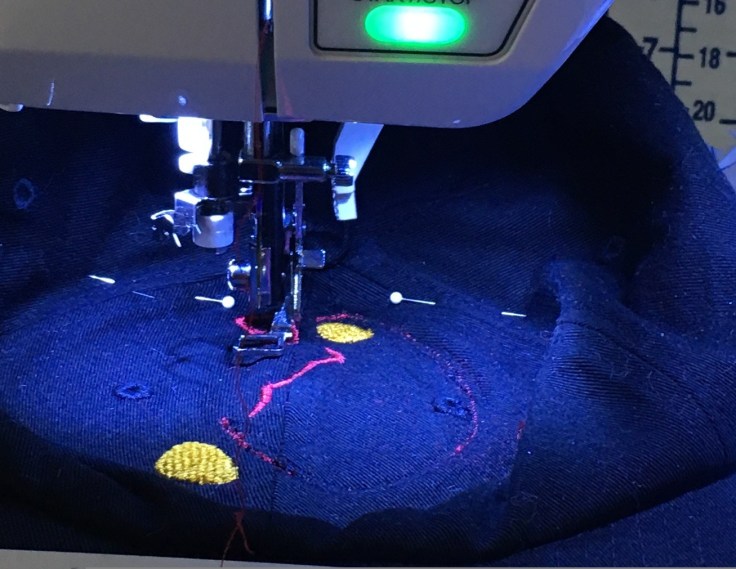
Finally my hat looked like Swiss Cheese.

I put the hat up to a light and you can see light shining through. I could maybe give it one more go with new stabilizer… but if things didn’t line up perfectly, those holes would show on the final product.
New Hat… Take two.
My Solution:
Get a differently sized image. Thankfully the company I purchased this image from has it in smaller dimensions. The small looks to be just right at 3.75″ x 3.92″ and 10,000 fewer stitches to worry about 🙂 The new design will set me back another $4.50 but the new hat is gonna cost me $7.99. Once again an ounce of prevention is worth a pound of cure.
I think that if I had looked at the differences between the large and the medium and the small I would have realized something was off about this design in sizing.
Width Height Stitch Count % Size change % Stitches
Large 5.75″ 5.98″ 29532 100% 100%
Medium 4.79″ 5.04″ 23176 83% 78%
Small 3.75″ 3.95″ 16699 65% 56%
Each new design being sold was only a difference of around 15% indicating that any change of more than 15% would be worth purchasing a new design.
As of Now:
Thus far, none of my issues have been with Hat hoop so I’m ready to give it a second shot. There has been some slipping and I had some choice words for getting my Singer software to line up with the hat hoop that I may write about later. But as of today the Hat Hoop is working okay.
I am currently waiting on the new hat to arrive from Amazon. I’ll let you know how my next attempt goes 🙂

Leave a comment