I know I promised a post about thread tension this week, but I’m moving and haven’t had any time to write this week! So in order to keep my writing schedule I will interrupt the normally scheduled 2.5k post with this little tidbit I learned while doing the Pegasus Apron in 10 Steps to Remedy Metallic Mayhem.
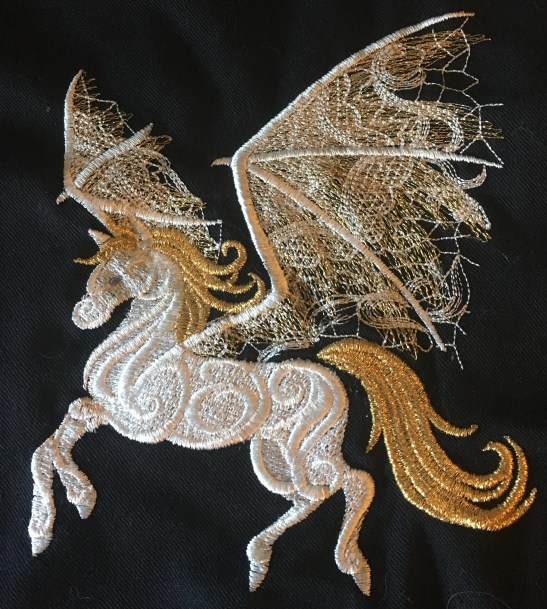
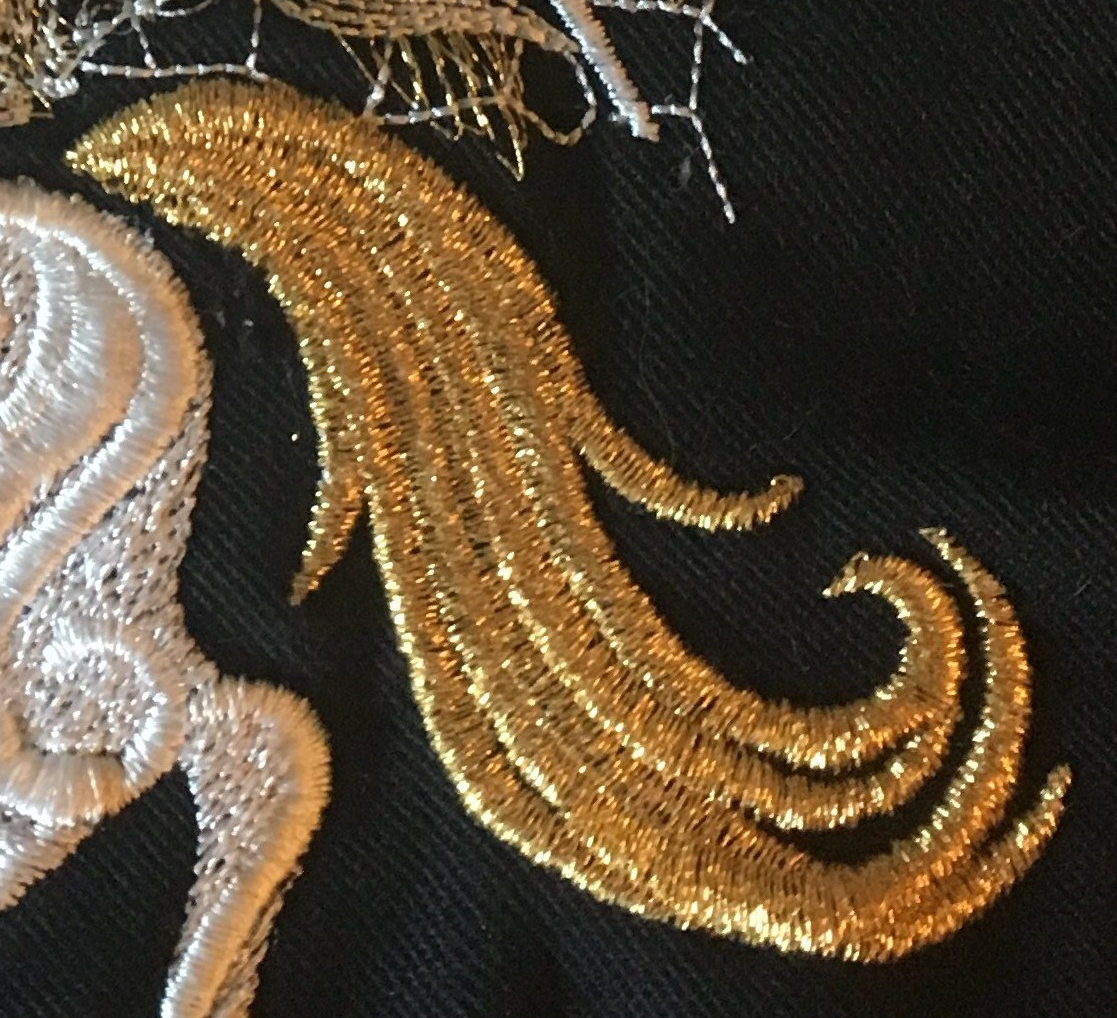
If you recall from that posting, I hit a snare. It was a nasty snare in the tail. The tail of the Pegasus is a series of satin stitches laid one over another to show the strands of tail. Metallic thread and satin stitch do not good bedfellows make.
The snare was epic, there must have been fifteen maybe twenty strands all caught up in the bobbin. I was using scissors and thread rippers to free the fabric in the hoop. Finally it came free and I had a gaping hole where my tail should have been.
I was stunned. After more than six hours of babying this design to have the LAST layer destroy the rest of the piece was heart breaking. I just couldn’t let it go. I had to at least try to save my Pegasus.
This is the moment I mention that the machine needs to be cleaned. Before trying this solution, ensure that you have followed the 10 step process from my other posts to remove the remains of the snare from the machine.
I knew that if I tried to unhoop the design I would never be able to realign the layers so rather than do that I used Sulky Sticky Tearaway Stabilizer. I think any Sticky Tearaway Stabilizer would do the trick, but don’t try spray adhesive. You need the stabilizer to stick to the remaining edges of the fabric and hold them steady. Take a square of the sticky stabilizer and adhere it to the back side of your embroidery. Apply pressure, you really want a good bond between the old stabilizer and the new stabilizer.
I then used a square of the clear water soluble stabilizer which was 1″ larger than the tail on each edge and I pined the stabilizer in place over the hole, catching the edges of the sticky stabilizer with the pins. Because the sticky stabilizer was poking through the hole and the water soluble stabilizer stuck to the sticky stabilizer.
Thus I had a new layer to embroider onto. I reset my machine to reset the embroidery arm and restarted the tail. I slowed down to a crawl to ensure the thread didn’t snare again.
It worked! Holy Sh!t it worked. The tail didn’t quite line up perfectly, but it wasn’t bad.

And as you can see, no holes in sight. Make sure you tear off the tear away stabilizer and wash the garment to remove the water soluble stabilizer. This will leave you with a crisp, clean design with no holes.
Lessons Learned:
- Breath… When catastrophe hits breath, take a break, go to bed, it will all look better in the morning.
- If your machine starts beeping at you (especially if it is a #6 alarm) then do not just say, “nothings wrong” (Start). The reason the snare was so bad was that I restarted the machine like six times trying to figure out what was wrong….
- There is literally stabilizer for any situation. Just look up your problem and you can probably find stabilizer which will hold your fabric just so to embroider on.
There, I knew I could keep it short 🙂 Good luck, you can do it. I believe in you.

Leave a comment